THE PRINCESS AND THE FROG - blue bedroom chair


There will eventually be a second part to this post as this cute antique chair has a partner. They were both painted using blue and white chalk paint.


Pin It Now!

FIXING BROKEN DINING CHAIRS - sheild back chairs


I found a set of six vintage shield back dining chairs on CL. They were gorgeous and just what I wanted.


Pin It Now!

VILAS DINING TABLE


It may not have pretty curves or fancy carvings but it has beautiful functionality and solid
construction with great history.
 
 
I found a Vilas table put out on the road side for the garbage men to take away.
It had silver spray paint on it like it had been used as a shop table and most of the original
finish was damaged or flaking.


But it was a fabulous solid rock maple small space dining table with 2 extending leaves.
You just don't find these every day.


It was easy to sand where the finish was flaking off,
and not so easy where the silver metallic paint was.


The leaves pull out so smoothly.
 
 
After cleaning it up and sanding to bare wood it got sprayed with chalk paint.


A gentle sanding started to create a nice white wash look.


This is really a great table, I wish I had space to keep it.


Poly and wax created the softest smoothest surface.


Pin It Now!

PAINTING WHITE OVER RED - distressed antiqued chest


This antique dresser had been painted in a rusty red color before I found it. I chose to work with it to create the vintage distressing. 


Pin It Now!

LISA'S NEW VANITY - matched vanity mirror & stool


Soft Turquoise paint project.
 
Pin It Now!

IT'S NOT OVER TILL THE FAT LADY SINGS - black harp table


I want to say this was a simple revamp I did on this recent find,
however this piece is anything but simple.


All the ladies in the shop we found this table in, had ideas of
purchasing the table themselves but agreed it was very dated in appearance.


Who wouldn't fall in love with her shape and style.


Some prep work,


A bit of primer,


A little bit of paint,


And a good polish,


has made her sing once again.


I do believe this table was made by a craftsman and is not a
production line manufactured piece making it one of a kind.


You can always follow along on 
INSTAGRAM @4_the_love_of_wood
where you get sneak peaks of what I am up to.

*******************************************
Stop into FIRSTFINDS HARDWARE STORE to see all the
vintage switch plates to choose from

Firstfinds Hardware Store
  also has hundreds of vintage hardware
 pieces available for your next project.


Pin It Now!

CUPBOARD WAXING - shabby chic cupboard nightstands


We found a great little pair of bedside tables while we were
second hand shopping recently.


This is one of those deceiving before photos where the items look better then they actually are.
Why doesn't that happen when we want it to?


I removed the hardware and gave them a good cleaning.


The doors have glass inserts which come out very easily making painting
a lot smoother.


I spray painted the handles bright white.


I chose to paint the inside of the cupboard which taught me,
waxing and buffing the inside of cupboards isn't a lot of fun.


The glass insert in the doors have a pretty white boarder detail which accents the handles nicely.


I used old white chalk paint in the sprayer and hand sanded to distress these little gems.


I added a soft rose printed paper for a drawer liner.


********************************************

Have you stopped into firstfinds hardware store lately?
Here are just some of the items available for your projects.


Pin It Now!

THE INQUISITOR, HER ASSISTANT, AND THE UPHOLSTER'S WIFE - chocolate slab coffee table

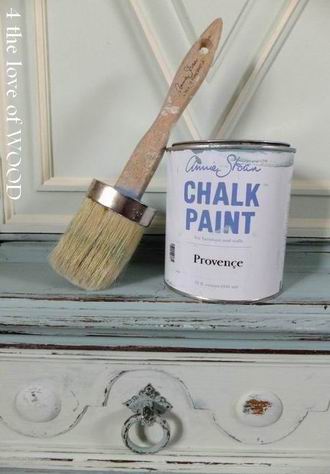
The first project the workshop ladies tackled was to learn how I
use stain over my signature white paint.


and then how to finish the wood top with the same stain.

The table was finished in a typical medium wood color with a glossy finish.
(NO BEFORE PHOTO)

I started with showing them how to degloss the wood legs and apron to accept
primer and eventually paint.


The questions flowed easily for everyone especially Danielle.
Her good friend Nikki was so eager to get supplies at the end of the day
she was ready to drive off and leave Danielle behind.


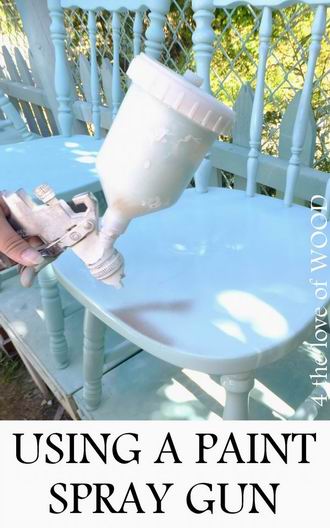
We went over mixing and straining primer and paint thru for the sprayer.


Everyone got a chance to hold the spray gun and give it a try.


My experience running crews of 20 workers all the way down to a single
assistant is quite extensive however I've never come across a group that
meshed so quickly and used each other so supportively.


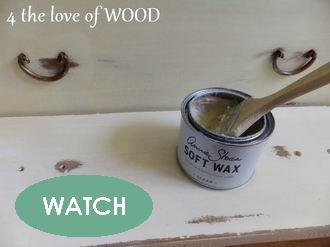
They got to feel how wax can help move the stain around once it starts to set.
Kelley got right in where I left off doing a fabulous job.


A few ladies even tried the belt sander when we first started to strip the table top.


We still had to get to a drawer repair, changing out hardware, including spray painting it
and using wood filler so we had to keep moving on so I would get to finish this coffee table later.


That evening I sanded the edge of the top and stained it.


I started applying the wipe on poly the next day.


Sanding with 400 grit between many many coats.


This is how it look when you sand with 400 grit.
A very white chalky dust.


Once I got the thickness I wanted one last sanding before waxing.
The final coat of wax adds a soft warm feel to the finish.


Pin It Now!

Email your Questions or Comments

Name

Email *

Message *

POPULAR ARTICLES

Your first stop for vintage hardware