MAGICAL TOUR - the urban gypsy

I'll give some insight into the photos you are looking at shortly.


Yesterday was quite the day.
We had a deliver to make to North Van,
(those who don't know that's a good hour away from home)


then to pick up several pieces of my finished work on Kingsway to bring back home.


I did some pedaling of my wares on the street corner.


Okay it wasn't totally like that but we did have 2 customers pick up pieces
as we were loading the van. 


And I want to thank those customers for saving us a bit of time, energy, and space.


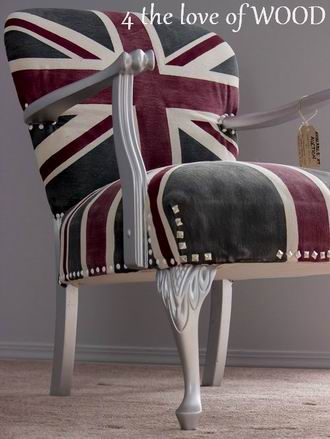
But my favorite part of yesterday was dropping the Jack Dining Set off
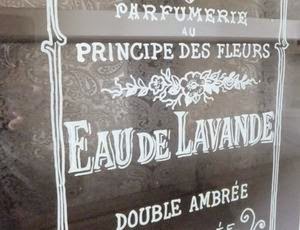
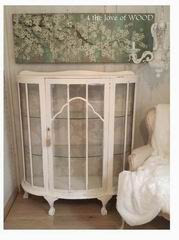
at another store on our way back. (all these photos were taken there)


Jason, the store's proprietor and I have conversed via email for some time
and just before we left the house for the days adventures


He emailed asking if I wanted to bring the dining set in to display at his store.


Truth be told I didn't have to think on it too long,
the set was never going to get top billing in our small space,
and I welcomed the prospect of finally meeting Jason.


I didn't realize what I was getting myself into! (in a good way)
I was overwhelmed at how wonderfully welcoming he was to us
and complementary of my work.
After pulling me behind the counter to show me photos of a painting project he had done,
(in ASCP) he took us on the tour.
And what a tour it was!
He's incredibly knowledgeable about his inventory,
all of which is beautiful solid wood furniture hand carved and imported from India and Asia.


The first time around I didn't even think to take my camera out, I had to go back around a second
time to do that. No skin off my back I was thoughly enjoying the view everywhere I looked.
Admittedly I'm not a huge fan of Indian decor but the WOOD is so beautiful.


Jason also showed us a Tibetan Singing Bowl
(i think that's what it was called, he'll correct me if I'm wrong)
And it really does sing in a matter of speaking.
Unfortunately I did not get a photo of it because I was so memorized.
I think I might want one!


Needless to say the Union Jack Dining Set is available and on display at:


The Urban Gypsy
614 Columbia St
New West
604-520-7725
www.theurbangypsy.com

There are more detailed photos to look at on the URBAN GYPSY web site
but if you are in the area plz stop in to see Jason and everything he has to offer.
It really is magical!

Make sure to ask to see the singing bowls.

Pin It Now!

MERRY CHRISTMAS - snow pictures

For everyone without a white Christmas.


Pin It Now!

A PROVINCIAL PAIR - nightstand and hiboy


Right now George is working countless hours running his business and doing deliveries,
which intern giving me extra time to work on painting guilt free.
This hiboy and nightstand are one of the latest projects that have been completed.


I'd like to say it was a simple redo, and in simple terms it was.
No repairs were needed.


However it did take countless hours to pianted both pieces in Old White


Then wax both pieces, removing the excess as I went along.


Then washed them in thinned out Graphite chalk paint and remove the excess.


Wax and polish every inch of the dresser and table again.


Once all that was done,
I hand painted each handle with Graphite chalk paint highlighting the girly curves.


The final step was to prep the arborite tops with a primer.


Wrap the body in plastic and get them outside before spraying the top in a glossy black.


Sharing at:
Redoux

Pin It Now!

RED BERRY DECOR - christmas decorating


For the holidays this year our front door was adorned with a cute pair of decorative skates, I found at the grocery store!
Pin It Now!

FAUX MARBLE MASTERPIECE - old dresser makeover


This OLD WORLD style dresser is almost complete.
I'm still going to lay a few more coats of poly on the top. It has at least seven coats now but a few more won't hurt as I want a nice glassy finished look to the faux marble top I created.
Pin It Now!

PINK CHRISTMAS TREE - holiday decor


There was no plan to have a pink Christmas tree this year but somehow it happened anyway.
Pin It Now!

SHEET MUSIC WREATH - tutorial


Over the weekend a friend and I spend some time building her a sheet music wreath to hang over her mantle.


Pin It Now!

CHRISTMAS EYE CANDY - second visit to potters


This is our second visit to Potters Christmas store this year.

Pin It Now!

SHEET MUSIC TREES - tutorial


Here is my Sheet Music Tree tutorial so many have asked for.


Pin It Now!

HOLIDAY BANNER - tutorial


This is a tutorial of the steps I used to make my MANTLE MERRY CHRISTMAS banner.

Supplies you will need:
String
Scissors
Hot Glue Gun & Glue
Hole Punch
Glitter Letters
Sheet Music
Brown File Folder or Envelope

I started with an old inter-department mail envelope from George's days
in consulting work. You coulds also recycle used file folders.
You should be using something that is thicker then regular a paper.


Determine the size you want each of your letter flags to be and start cutting.

I cut everything free hand, no measuring.

Because I was using an envelope I had 2 layers of flags once they were cut.

Hole punch them where you will be threading the string to hang them from.

Now to your choice of words or saying.
For this tutorial I did a simple 4 letter word banner.

The glitter letters I used are from Michaels.
They have different fonts and sizes to choose from and come with adhesive backs.

Peel the backing off each letter and position them on your flags
keeping in mind you need room for the little pinwheel at the bottom of each.


Once your letters are secured start to fold your page of sheet music
length wise into one long accordian fan.

The thickness you choose to start your folds will also determine how
far or how deep your little pinwheel will be sitting on your banner flags.

You could do them really skin or overly fat.
It is all determined by your taste.

Now that your page is completely folded
you can cut your mini pin wheels.

Fold them in half and with your hot glue gun you
can start to secure them into their circular shape.


A little dab here,

A little dab there,

And a final dab to secure them into place on the bottom of each flag.


The string I use is hemp cord, also available at Michaels.


I had to find a place to hang this new banner to show it off
and thought you might like to see a new piece of
furniture I recently redid for our kitchen.

Pin It Now!

Email your Questions or Comments

Name

Email *

Message *

POPULAR ARTICLES

Your first stop for vintage hardware